Base Row Technique For Brick Stitch Beading
Brick stitch must have a foundation to build from. There are several ways to create a base row, also known as a foundation row, with beads. In this tutorial, you will see how to create a Back Stitch Base Row with a single bead technique to create the first row of your bead pattern. The beaded Back Stitch is generally associated with bead embroidery. However, this stitch is applicable in creating a base row for brick stitch. It is created by stringing the first row of beads, then stitching back through each bead so they align side by side with the holes of the beads on the outside rather than facing each other (like they would when simply strung together). This beading technique can be done with just about any type and size of seed bead. However, disk beads, beads with multiple holes, and triangular beads are not recommended with this stitch. Tube shaped beads, annular shaped beads (like Miyuki Delicas), barrel beads, cylinder shaped beads, crow beads, pony beads, and cube beads work well with the back stitch.
You can watch the following video or scroll down to see the individual slides of how to create a single needle ladder stitch base row for brick stitch beading with the single bead technique.
Watch the tutorial video:
You can view this video tutorial on YouTube here:
View the individual steps:
The Double Needle Ladder Stitch Single Bead technique tutorial is part of an educational video series on brick stitch beading techniques. Scroll down to view each step. Click on the images to view them larger.
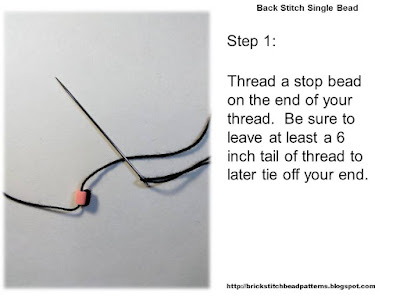
Step 1: Thread a stop bead on the end of your thread. Be sure to leave at least a 6 inch tail of thread to later tie off your end.
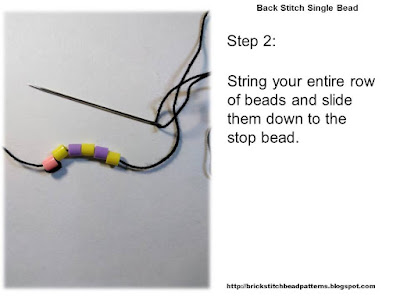
Step 2: String your entire row of beads and slide them down to the stop bead.
Step 3: Thread the needle through the back of the second to last bead.
Step 4: Pull the thread so the last two beads align side by side. Keep the thread loose, but no so loose that the beadwork looses its' shape.
Step 5: Thread the needle from the back of the next bead and pull the thread so that the bead aligns side by side with the last bead.
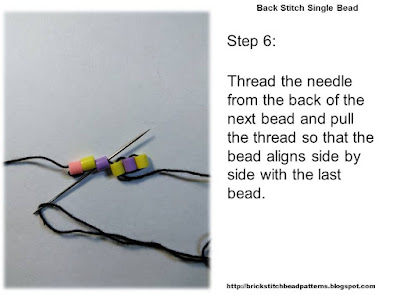
Step 6: Thread the needle from the back of the next bead and pull the thread so that the bead aligns side by side with the last bead.
Step 7: Thread the needle from the back of the next bead and pull the thread so that the bead aligns side by side with the last bead.
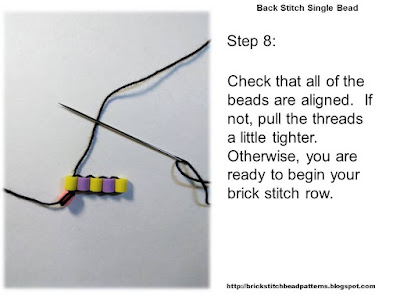
Step 8: Check that all of the beads are aligned. If not, pull the threads a little tighter. Otherwise, you are ready to begin your brick stitch row.
Follow Brick Stitch Bead Patterns Journal on Social Media:
YouTube: Brick Stitch Bead Patterns Journal


